Stair Sensor Light Size & Wattage Guide for Safe, Efficient Lighting
Navigating your stairs safely, especially at night, often comes down to good lighting. Sensor lights are a fantastic solution, turning on exactly when you need them and off when you don’t. The key to making them truly effective and efficient lies in choosing the right size and wattage. Simply put, the ideal stair sensor light size and wattage will provide enough illumination to prevent trips and falls, without being so bright that it’s uncomfortable or wasteful. It’s about finding that sweet spot for visibility, energy savings, and a pleasant user experience.
Understanding Sensor Light Types for Staircases
Before diving into size and wattage, it’s helpful to know what kinds of sensor lights Hozolighting are generally suitable for stairs. Each type has its own strengths and ideal applications.
Motion-Activated Sensors (PIR)
Passive Infrared (PIR) sensors are probably what most people think of when they hear “motion sensor light.” They detect changes in infrared radiation, which is emitted by warm bodies (like people). When someone walks into the sensor’s field of view, the light turns on.
- How they work: They have a detection range and angle. When a warm body moves across this field, the sensor registers the change and triggers the light.
- Pros for stairs: Highly effective for human presence, energy-efficient as they only activate when needed.
- Cons for stairs: Can sometimes be triggered by pets if mounted too low, or if the detection zone is too broad. False triggers can also occur from heat sources or drafts in some cases, though modern sensors are quite good at mitigating this.
- Best placement consideration: Placing them at the top and bottom of the stairs, or strategically along longer flights, ensures timely activation.
Occupancy Sensors
Occupancy sensors are a bit more sophisticated than basic PIR. While they often use PIR technology, they can also incorporate ultrasonic or dual-technology sensing. The main difference is that occupancy sensors are designed to keep the light on as long as the space is occupied, even if there’s no continuous movement.
- How they work: They detect presence and will keep the light illuminated if they sense someone is still in the area, even if they’re sitting still. They typically have an adjustable delay before turning off.
- Pros for stairs: Excellent for situations where someone might pause on the stairs or move slowly, ensuring the light doesn’t prematurely switch off.
- Cons for stairs: Can be slightly more expensive, and if not calibrated correctly, might stay on longer than necessary.
- Best placement consideration: Very useful for long staircases or landings where people might linger.
Ambient Light Sensors (Photocells)
While not a primary trigger for stair lights, ambient light sensors (or photocells) are often integrated into motion or occupancy sensors. They prevent the light from turning on if there’s already sufficient natural or artificial light.
- How they work: They measure the surrounding light level. If it’s above a certain threshold, the sensor will prevent the motion/occupancy sensor from activating the light, even if motion is detected.
- Pros for stairs: Saves energy by ensuring lights only come on when truly dark, avoiding unnecessary activation during the day.
- Cons for stairs: If the threshold is set too high, the light might not activate in dimly lit conditions where some additional light would still be beneficial.
- Best integration: Look for sensor lights that include this feature, often labeled as “dusk-to-dawn” or having an adjustable “lux” setting.
Determining Optimal Light Size and Placement
The “size” of a stair sensor light isn’t just about its physical dimensions, but more importantly, how much area it effectively illuminates and its detection range. Proper placement is crucial for both safety and efficiency.
Light Coverage Area
The most important aspect of light size for stairs is ensuring comprehensive coverage. You need enough light to see each step clearly, from top to bottom, without creating harsh shadows or blinding glare.
- Single fixture strategy: For short staircases (e.g., 3-5 steps), a single well-placed fixture at the top or bottom might suffice. Its beam spread needs to cover the entire length and width of the steps.
- Multiple fixture strategy: For longer, winding, or multi-landing staircases, you’ll almost certainly need multiple fixtures. This ensures consistent illumination and prevents dark spots.
- Beam angle: Consider the light’s beam angle. A wider beam angle is often better for general stair illumination, ensuring steps are lit uniformly. Narrower spot beams can create harsh shadows.
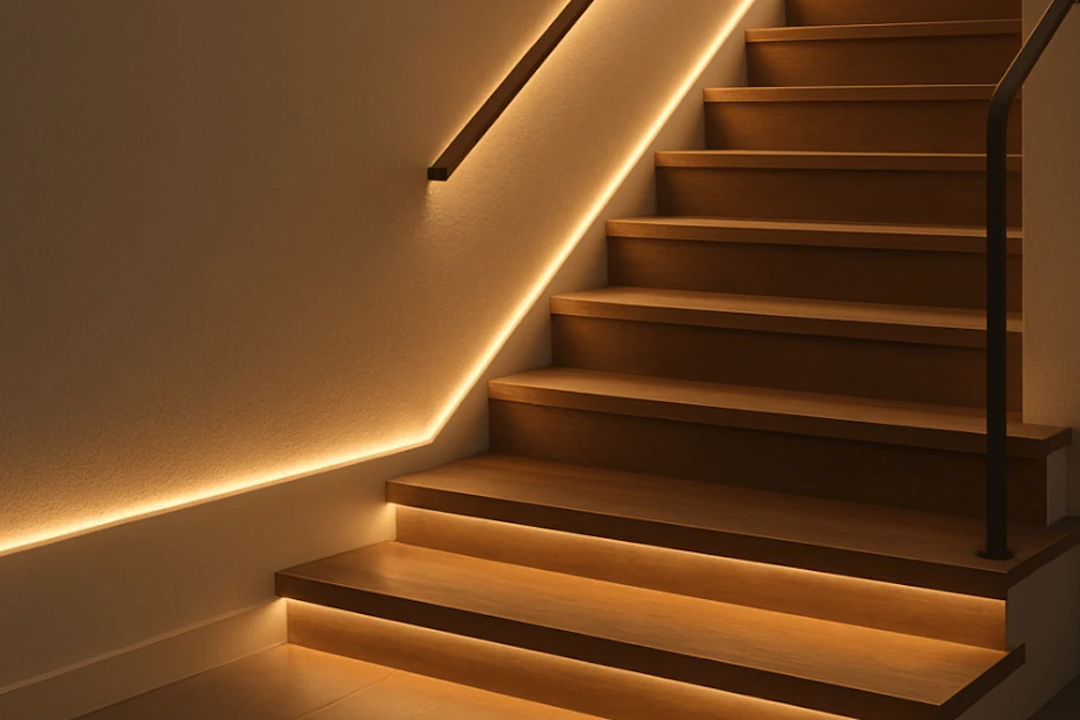
- Wall wash effect: Some fixtures are designed to “wash” light down the wall, which can effectively illuminate stairs without direct glare.
Physical Size and Aesthetics
While functionality is key, the physical size of the light fixture also plays a role, especially in residential settings.
- Recessed lights (step lights): These are small, unobtrusive fixtures installed directly into the wall alongside the steps. They offer a subtle, low-glare illumination ideal for guidance. Their small size means they usually require multiple units per flight.
- Surface-mount fixtures: These are mounted on the wall or ceiling. They come in various sizes, from compact puck lights to larger decorative sconces. Their size should be proportionate to the wall space and staircase scale.
- Integrated sensors: Many modern fixtures have the sensor integrated discreetly into the unit, maintaining a clean aesthetic.
Sensor Detection Range and Angle
The sensor’s capability is just as important as the light output itself. You want the sensor to detect movement reliably at the approach to the stairs, not halfway up.
- Horizontal range: This refers to how far away the sensor can detect movement in front of it. For stairs, you typically want a range that activates the light as you approach the first step, usually 5-10 feet.
- Vertical angle: This indicates the sensor’s field of view up and down. A good vertical angle ensures detection whether you’re at the top or bottom of the stairs, or if you’re approaching from a landing.
- Detection zones: Some sensors have multiple detection zones or can be adjusted. Aim for a zone that covers the entire path of travel on the stairs.
- Avoiding false triggers: Be mindful of where the sensor is pointed. If it covers a high-traffic area adjacent to the stairs, it might trigger unnecessarily. Also, avoid pointing it directly at heat sources or air vents.
Optimal Placement Strategies
Strategic placement is arguably the most critical factor for sensor light effectiveness on stairs.
- Top and bottom: At a minimum, place a sensor light at the very top and very bottom of the staircase. This ensures activation as someone approaches from either direction.
- Mid-flight for long stairs: For particularly long staircases or those with landings, consider additional sensor lights mid-flight or on the landings. This maintains consistent illumination and detection.
- Wall vs. ceiling mount:
- Wall-mounted (step lights/sconces): Often installed low, around 6-12 inches above the step, they provide excellent direct lighting to the treads and minimize glare. Multiple units per step or every few steps are common. Sensors should be integrated or placed near them.
- Ceiling-mounted: Downlights or flush mounts can provide broader illumination. If ceiling-mounted, ensure the sensor’s detection cone reaches down to cover the entire staircase effectively. This is usually better for overall ambient light rather than direct step illumination.
- Sensor height:
- For PIR sensors: Typically mounted around 6-8 feet high on the wall. This allows for a broad detection field. Experiment with the angle to ensure it detects human movement effectively without catching pets or passing traffic.
- For integrated step lights: The sensor is usually within the fixture itself, so the height is determined by the light’s optimal placement.
- Corner placement: For L-shaped or U-shaped staircases, ensure sensors are strategically placed to detect movement around corners, avoiding blind spots.
- Avoiding obstructions: Make sure the sensor’s view isn’t blocked by furniture, handrails, or decorative elements.
Wattage and Brightness (Lumen) Requirements
Wattage tells you how much energy a light consumes, while lumens tell you how bright it actually is. For sensor lights, you want enough brightness for safety without being overwhelming.
Understanding Lumens (Brightness)
Lumens are the true measure of light output. When choosing stair lights, focus on lumens rather than just wattage, especially with the prevalence of energy-efficient LEDs.
- General guidance for safety: For safe navigation on stairs, you generally want between 50-100 lumens per linear foot of staircase. This is a rough guide, and actual needs can vary.
- Step lights: Individual step lights are often low-lumen, perhaps 5-20 lumens each, relying on multiple units to achieve sufficient overall illumination.
- Wall sconces/downlights: A single fixture at the top or bottom might need to be brighter, perhaps 200-500 lumens, to adequately light a short flight.
- Ambient vs. task lighting: Stairs require task lighting – enough to see each step clearly. Don’t rely solely on general ambient lighting from adjacent rooms.
Wattage and Energy Efficiency (LEDs)
With LED technology, higher wattage no longer directly correlates with higher brightness. LEDs consume significantly less power for the same lumen output.
- LED benefits:
- Low power consumption: An LED light producing 400 lumens might only consume 4-6 watts, whereas an incandescent bulb would need 40 watts. This translates to substantial energy savings, especially for lights that might activate frequently.
- Long lifespan: LEDs last much longer than traditional bulbs, reducing maintenance.
- Instant on: LEDs reach full brightness immediately, which is crucial for safety on sensor-activated stairs.
- Typical LED wattage for stair lights:
- Individual step lights: Often 0.5-3 watts per fixture.
- Wall sconces/compact fixtures: 3-10 watts, depending on desired brightness and coverage.
- Ceiling downlights: 5-15 watts, again, depending on the area to be lit.
- Calculating total wattage: If using multiple fixtures, sum up the individual wattages to get an idea of the total power consumption. Even with many LED fixtures, the total wattage will be quite low.
Color Temperature (Kelvin)
While not directly related to size or wattage, color temperature (measured in Kelvin, K) affects how comfortable and visible your stair lighting is.
- Warm white (2700K-3000K): Creates a cozy, inviting atmosphere. Good for residential stairs where comfort is prioritized.
- Neutral white (3500K-4000K): A balanced light, often described as “daylight” or “cool white.” Offers good visibility without being overly stark. Excellent for most stair applications.
- Cool white/daylight (5000K-6500K): Brighter, more clinical light. While it enhances visibility, it can feel harsh in a home environment. Generally not recommended for residential stairs unless high contrast is specifically needed (e.g., in a utility area).
- Recommendation: For home stairs, aim for 3000K-4000K. This provides good visibility while maintaining a pleasant ambiance.
Dimming Capabilities and Adjustments
Some sensor lights offer adjustable settings for brightness (dimming) and duration.
- Adjustable brightness: Allows you to fine-tune the light output, ensuring it’s bright enough for safety but not glaring. Useful for different times of night.
- Delay timer: Crucial for stair sensor lights. This setting determines how long the light stays on after the last detected motion. You want enough time to safely ascend or descend the stairs and move away without the light turning off prematurely (e.g., 30 seconds to 2 minutes).
- Lux sensor adjustment: Allows you to set the ambient light level at which the sensor will activate. This prevents the lights from coming on during the day if there’s enough natural light.
Installation Considerations and Wiring
Proper installation ensures your sensor lights work reliably and safely. This section focuses on the practicalities once you’ve chosen your lights.
Wiring Types: Hardwired vs. Battery-Powered
The choice between hardwired and battery-powered often depends on the installation context.
- Hardwired (120V/240V AC):
- Pros: Consistent power, no battery changes, typically brighter options, can be integrated into existing home electrical systems.
- Cons: Requires electrical wiring, which can be complex and may need a licensed electrician. More difficult for retrofitting if no existing wiring is present.
- Best for: New builds, major renovations, or when replacing existing wired fixtures. Provides the most reliable and powerful lighting solution.
- Low Voltage (12V/24V DC):
- Pros: Safer to work with (less risk of shock), often part of integrated LED step light systems with a central transformer. Can be easier to run low-voltage wiring than high-voltage.
- Cons: Requires a transformer, which needs to be located somewhere accessible. Still requires wiring.
- Best for: Dedicated step light installations where multiple small lights are used.
- Battery-Powered:
- Pros: Extremely easy to install (no wiring needed, often peel-and-stick or magnetic mounts), highly flexible placement, great for renters or temporary solutions.
- Cons: Requires regular battery changes (can be frequent depending on usage), generally less bright than wired options, not suitable for high-traffic or primary safety lighting.
- Best for: Supplemental lighting, areas with no access to wiring, or a quick, non-permanent solution.
Electrical Codes and Safety
Always prioritize safety, especially when dealing with electricity.
- Local codes: Adhere to local electrical codes and regulations. These vary by region and dictate wiring methods, junction box requirements, and fixture types.
- Licensed electrician: For hardwired installations, especially if you’re not experienced, it’s highly recommended to hire a licensed electrician. They ensure safe, compliant, and reliable wiring.
- Turn off power: Always turn off the circuit breaker to the area you’re working on before touching any wires. Verify with a voltage tester.
- Proper grounding: Ensure all fixtures are properly grounded according to manufacturer instructions and local codes.
- IP rating: For lights in areas exposed to moisture (e.g., basements, outdoor stairs, or areas prone to spills), check the IP (Ingress Protection) rating. A higher IP rating indicates better protection against dust and water.
Mounting Techniques
The mounting method will depend on the type of fixture and the surface.
- Recessed (in-wall): Requires cutting precise holes in drywall or other wall materials. The fixture is then inserted and secured, often with clips or screws. This is a more involved installation.
- Surface-mount (on-wall/ceiling): Involves drilling pilot holes, inserting anchors if needed, and screwing the fixture base directly to the wall or ceiling. Wires are routed from a junction box to the fixture.
- Adhesive/Magnetic: Common for battery-powered units. Clean the surface thoroughly before attaching. Ensure the adhesive is strong enough for the fixture’s weight.
Integrating with Smart Home Systems
Modern sensor lights can often be integrated into smart home ecosystems, adding another layer of convenience and control.
- Smart sensors: Some dedicated smart motion sensors can trigger non-smart lights via a smart switch or hub.
- Smart bulbs/fixtures: Install smart bulbs or fixtures that have integrated sensors or can be controlled by external smart sensors.
- Benefits:
- Customizable schedules: Set specific times for sensor activity.
- Advanced automation: Create routines where stair lights interact with other smart devices (e.g., turning on hallway lights simultaneously).
- Remote control: Adjust settings or manually turn lights on/off via an app.
- Voice control: Use voice assistants to control stair lighting.
Maintenance and Troubleshooting
Even the best sensor lights occasionally need attention. Understanding common issues and how to maintain your system will keep your stairs safely lit for years.
Routine Maintenance
A little preventative care goes a long way in extending the life and reliability of your sensor lights.
- Cleaning sensors and lenses: Dust, dirt, cobwebs, and even paint splatter can obscure a sensor’s lens, reducing its effectiveness. Gently wipe the sensor surface with a soft, damp cloth periodically. Avoid harsh chemicals.
- Checking connections (for hardwired): If you notice flickering or intermittent operation, and you’re comfortable and qualified, carefully inspect exposed wiring connections for tightness. For any major electrical issues, consult an electrician.
- Battery replacement (for battery-powered): Establish a routine for checking and replacing batteries. Low batteries can cause dim light, slow response times, or complete failure. Use high-quality batteries to maximize lifespan.
- Fixture cleaning: Wipe down the light fixture itself to remove dust and maintain its aesthetic appeal.
Common Troubleshooting Scenarios
Here are some frequent problems with sensor lights and practical steps to address them.
Light Not Turning On
- No power:
- Hardwired: Check the circuit breaker. Ensure it hasn’t tripped. If it’s a new installation, double-check all wiring connections (or have an electrician do so).
- Battery-powered: Check if batteries are dead or inserted incorrectly. Replace them.
- Sensor obscured: The sensor lens might be dirty, blocked by an object, or painted over. Clean or clear the obstruction.
- Ambient light too high: The integrated photocell (dusk-to-dawn sensor) might be detecting too much ambient light. Adjust the “lux” or “ambient light” setting if available, or test at night.
- Motion not detected:
- Wrong angle/range: The sensor might not be pointed correctly to detect movement on the stairs, or the movement might be outside its detection range. Adjust the sensor’s direction or sensitivity.
- Movement too slow/small: Some PIR sensors struggle with very slow movement or small objects (though usually not an issue for human-sized activity on stairs).
- Faulty sensor or bulb: If all else fails, the sensor itself or the light source might be defective. Test the bulb if it’s replaceable, or consider replacing the entire unit if it’s an integrated LED fixture.
Light Staying On Too Long or Not Turning Off
- Detection zone too broad: The sensor might be detecting movement outside the immediate stair area (e.g., from a nearby hallway or room). Adjust the sensor’s angle or reduce its sensitivity.
- False triggers:
- Heat sources: Air vents, heating pipes, or even direct sunlight can sometimes trigger PIR sensors. Try to reposition the sensor away from these.
- Pets: If mounted too low, pets can trigger the sensor. Adjust the height or angle if possible.
- Moving objects: Curtains swaying in a draft or reflective surfaces catching light might cause false triggers.
- Delay timer set too long: Check the “delay off” or “duration” setting on the sensor. Reduce it to a more appropriate time (e.g., 30 seconds to 2 minutes).
- Faulty sensor: If the light consistently stays on without any apparent reason, the sensor itself might be faulty and require replacement.
Light Flickering or Dim
- Loose wiring (hardwired): A loose connection in the wiring or within the fixture itself can cause flickering. This needs immediate attention from a qualified person to prevent fire hazards.
- Failing bulb: If it’s a replaceable bulb, it might be nearing the end of its life. Replace it.
- Low batteries (battery-powered): Batteries are likely weak. Replace them with fresh ones.
- Incompatible dimmer: If the sensor light is connected to a dimmer switch not rated for LEDs (or not compatible with the fixture), it can cause flickering or damage.
- Overheating: While rare with LEDs, some enclosed fixtures might not dissipate heat effectively, leading to dimming or early failure. Ensure proper ventilation if specified by the manufacturer.
By understanding these practical aspects of stair sensor lighting, you can make informed choices that enhance safety, save energy, and improve the overall comfort of your home. The right light at the right time makes all the difference.